

Ankole Inspections: Complete Breeder Guide
Ankole Inspections: Complete Breeder Guide
By Martin Joubert & Sally Blaine
Introduction
Inspections are essential for maintaining the quality and integrity of the Ankole breed. They are not only a requirement for registration and sale, but also a powerful management tool for improving your herd.
Animals must be inspected between 12 and 36 months of age and approved before being marketed as stud or auction animals.
Understanding What Inspectors Look For
General appearance and breed character
Inspectors first assess whether the animal clearly represents the Ankole breed. This includes coat colour, balance, and overall presence.
Head and horns
The head and horns are key breed identifiers. Correct horn colour, symmetry, and jaw alignment are essential for both breed purity and functionality.
Body structure and capacity
A strong topline, deep middle, and balanced frame indicate good growth potential and reproductive capacity.
Legs, hooves, and movement
Mobility and structural correctness are critical. Animals must walk freely with correct leg alignment and strong hooves.
Reproductive soundness
Inspectors evaluate reproductive organs for functionality. In bulls this will include a review of the testes and sheath. In cows this will include a review of the udder and genitalia.
Breeders must disclose any fertility concerns and provide feedback to the Society if there are fertility impediments in either bulls or cows.
Size and condition
Animals should be appropriate in size and condition for their age, reflecting both genetics and management.
Preparing for an Inspection
You will get the best value from an inspection if you are well prepared. The following steps will support you to be ready when the inspector arrives on your farm:
- Identify the animals that you would like inspected. Put them in a kraal where the inspector can get to within 10 meters of the animal.
- Make sure you or your farm manager are on the farm. Inspections are a very valuable opportunity to learn what to look for in your breeding programme.
- Prepare any relevant paperwork you think will be necessary such as extracts of the 5 Generation Pedigree, proof of DNA and registration of birth forms.
Virtual Inspections
We understand that it is not always possible to get an inspector to your farm to complete inspections. In line with this, the Inspectors allow you to submit good quality photographs and video footage to allow for a virtual inspection.
Your photographs need to show at least the following:
- A clear picture of the animal’s head and mouth with the animal facing the camera directly and from the side. The side photograph needs include a close up of the muzzle.
- A clear picture of their horns from the front and from the side.
- A full body picture, including legs and hooves from the front, back and from both sides.
- A close-up picture of all four hooves.
- A close-up picture of the udder and vagina or testes and sheath of the animal.
In addition to this, you need to send clear video footage where the animal is on a level surface, is no further than 10 meters from you and:
- It walks directly towards you.
- It walks directly away from you.
- It walks past you from both the left and right side.
These photographs and videos must be shared with Lauren James, our Breed Director, who will share them with the inspectors for review and feedback. The benefit of a virtual inspection is that all the inspectors will consider the material send.
How Will I Know the Outcome of My Inspection
You will be given feedback on the animals that are inspected. Specific feedback will be given if an animal does not meet the breed standards. If this is the case, all inspectors will have reviewed the case before a final decision is made. The disqualification codes that will be used are as follows:

| CODE | DESCRIPTION | ✓ |
|---|---|---|
| 1 | Full blood DNA parentage is matched and available | |
| GENERAL | ||
| 2ANK | Age of first calf greater than 60 months | |
| 3ANK | ICP not exceeding 760 days | |
| 4ANK | Any hereditary defect | |
| TYPE/ COLOR/ HAIR | ||
| 5ANK | Frizzy or woolly summer coat | |
| 6ANK | Any signs of impurity | |
| 7ANK | Not phenotypically Ankole | |
| HEAD AND HORNS | ||
| 8ANK | Undershot, overshot, wry muzzle | |
| 9ANK | Poor eyes or eye brows | |
| 10ANK | Permanent watery discharge from eyes | |
| 11ANK | Horns not ivory to white, except Black Ankole | |
| 12ANK | All horns shapes allowed except genetically deformed horns | |
| LEGS/ HOOVES | ||
| 13ANK | Hoof size, abnormal hooves | |
| 14ANK | Patela fixation | |
| 15ANK | Excessively course boned | |
| 16ANK | Sickle or cow hocks | |
| 17ANK | Bandy, X legged or pigeon toed | |
| 18ANK | Upright or sagging pasterns | |
| 19ANK | Unnatural gait | |
| BACK TO TAIL | ||
| 20ANK | Hollow, sway, hunch or roach back | |
| 21ANK | Laterally twisted spine | |
| 22ANK | Congenital kink in upper third of tail | |
| 23ANK | Devils grip | |
| MUSCLING/ CONSTITUTION | ||
| 24ANK | Excessive muscling/ double muscling | |
| 25ANK | Weak constitution | |
| SCROTUM/ SHEATH + UDDER | ||
| 26ANK | Hypoplasia or scrotal defects | |
| 27ANK | Prolapse or angle of sheath more than 45 degrees to underline | |
| 28ANK | Under developed female genitals or udders | |
| 29ANK | Poor udder, teat development or placement | |
| SIZE | ||
| 30ANK | Underweight for age | |
| POSITIVE TRAIT CODES | ||
| 31ANK | Masculinity | |
| 32ANK | Constitution | |
| 33ANK | Hair and coat | |
| 34ANK | Balance | |
| 35ANK | Hooves | |
| 36ANK | Horns | |
| 37ANK | Muscling/ beef | |
Costs of Inspections
Breeders are expected to cover the costs of an inspection. The costs fall into different categories:
- Travel costs per km
- A day fee for the Inspector
- A per animal inspection fee.
The Breed Director will provide you with these costs when you book your inspection. In the case of a virtual inspection, there will obviously be no travel costs included.
Wrapping Up
Finally, inspections are not just about passing. They are about building a better herd through consistent, informed selection. Use this time with an inspector to learn more about what to look for, to identify your strongest and weakest traits in animals and to inform how you breed to correct or use these traits.

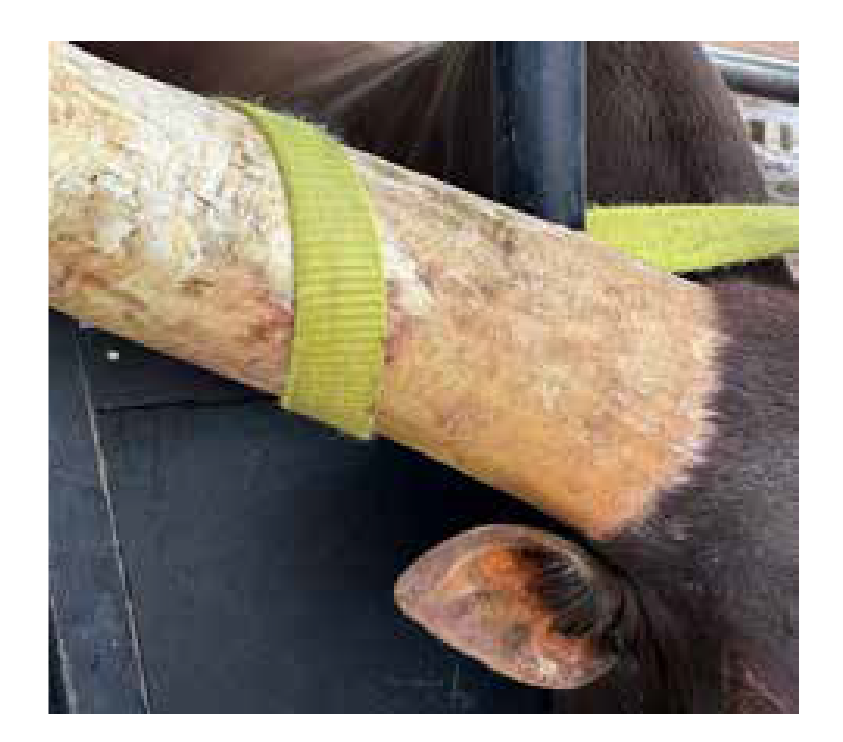
How to Measure Ankole Horns: A Step-by-Step Guide
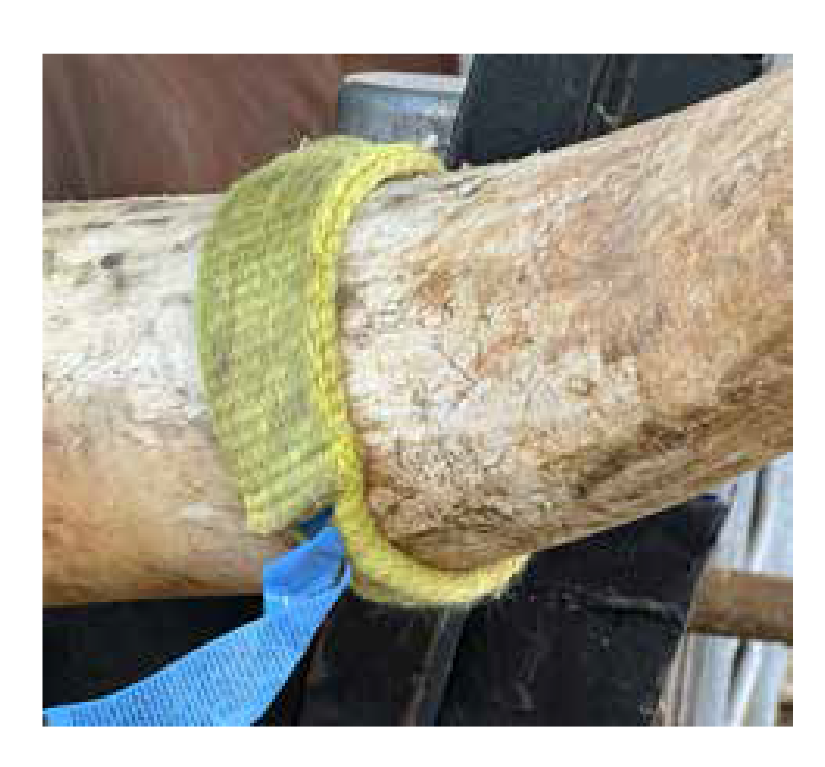
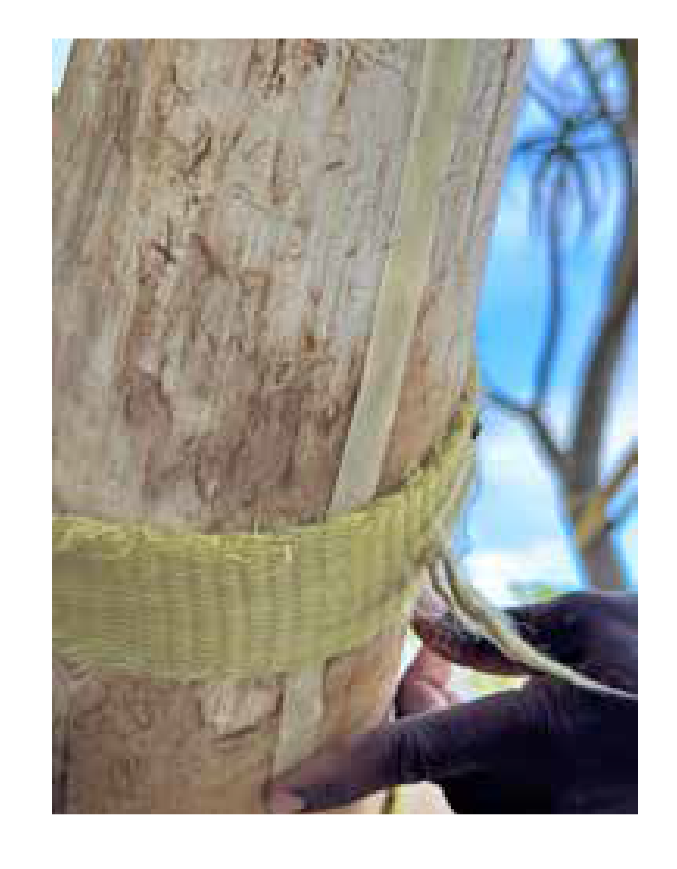
Measuring Ankole Horns
A Practical Guide For breeders who want accurate, reliable results in the field
By Daniel Naude & Sally Blaine
Measuring Ankole horns is one of the most common—and important—tasks for breeders. Good measurements add real value when marketing animals. The key is to keep the process simple, repeatable, and as accurate as possible.
Why Accurate Measurements Matter
Horn size is a defining feature of Ankole cattle. Buyers pay attention to it, and breeding decisions often depend on it. If your measurements are inconsistent or inaccurate, it can affect credibility and pricing.
The goal is straightforward:
- Measure consistently
- Use the right tools
- Keep good records
Step 1: Get Your Tools Ready
You’ll need:
- Tow rope, straps, or strong ropes
- Weed-eater (nylon) line
- Masking tape
- Steel measuring tape (non-stretch)
- Pencil or marker
Step 2: Prepare Your Animal
Use a neck clamp or crush and secure the animal with ropes around the horns. Walk animals through the clamp regularly so they stay calm and are familiar with being in the crush.
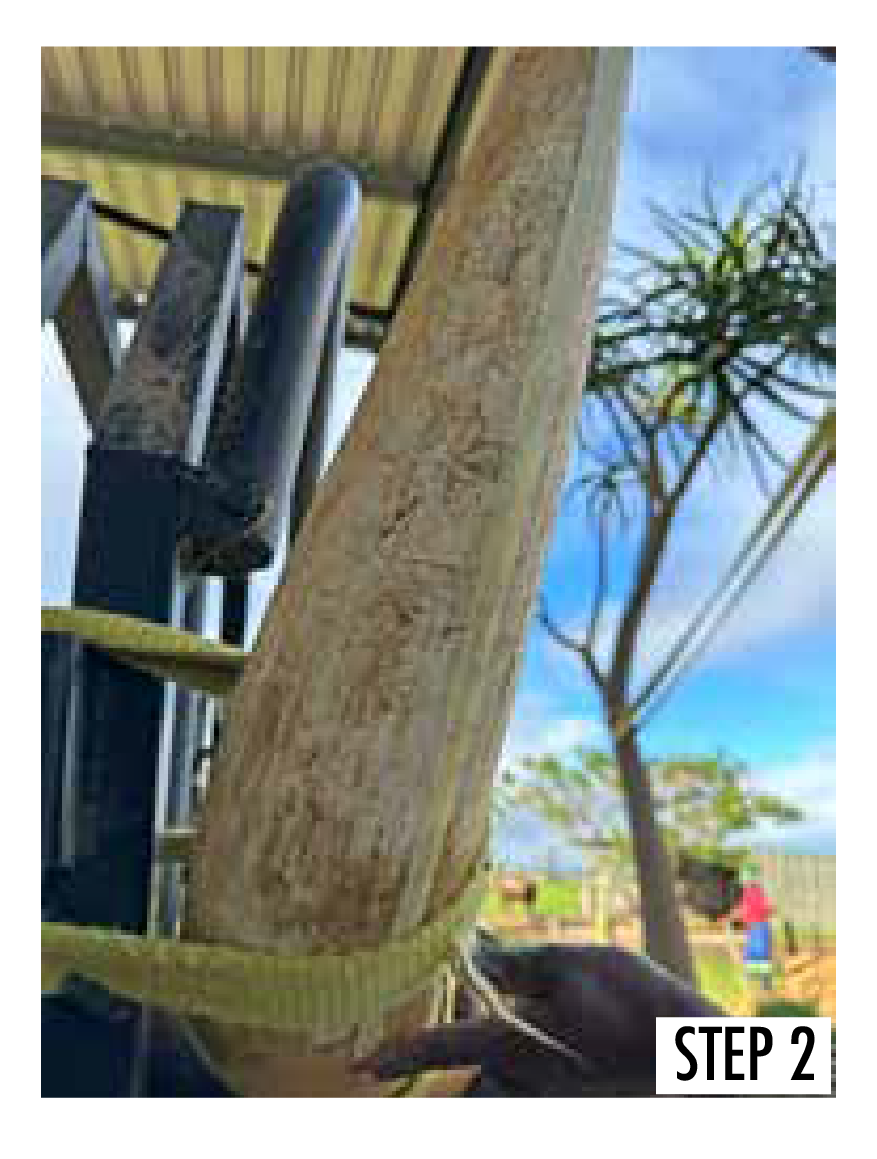
Step 3: Understand What You’re Measuring
You are measuring:
- Circumference of each horn base
- Length of each horn (outer curve)
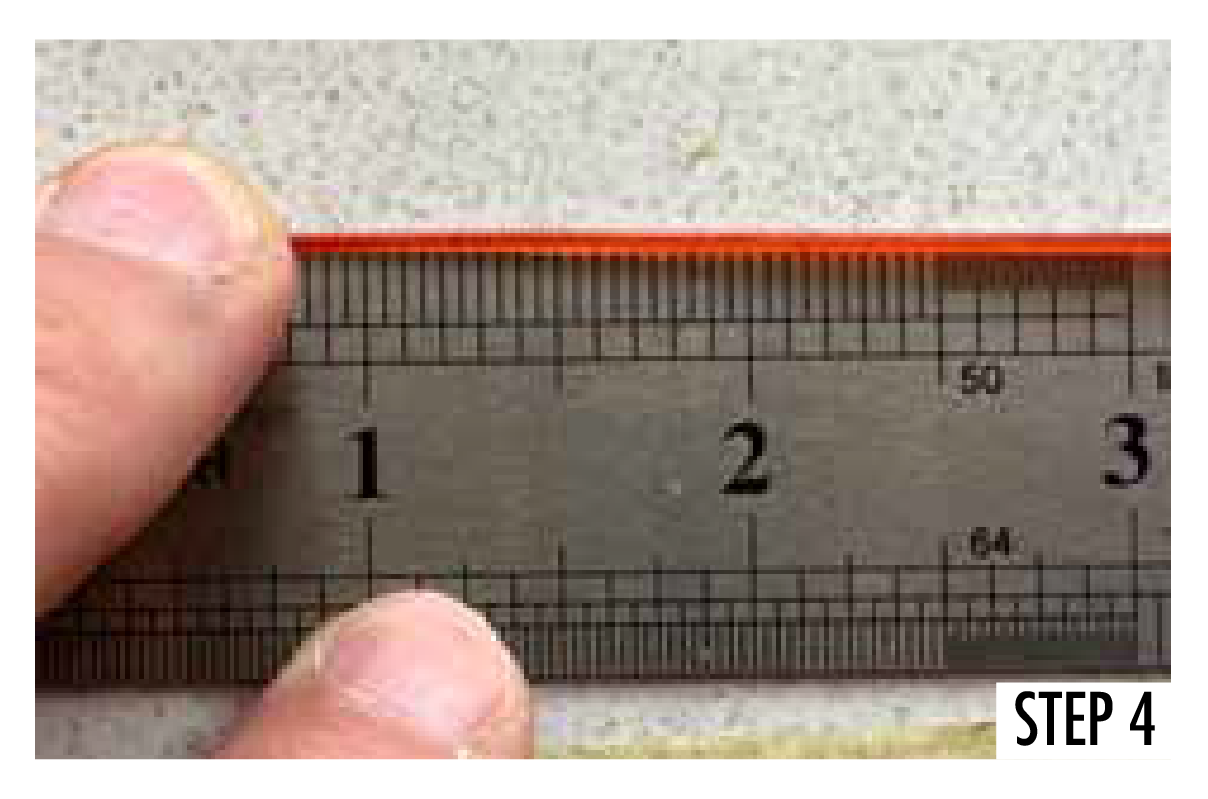
Step 4: Measuring the Horn Bases
Wrap the line around the horn base at the hairline, mark where it meets, then measure it flat using a steel tape.
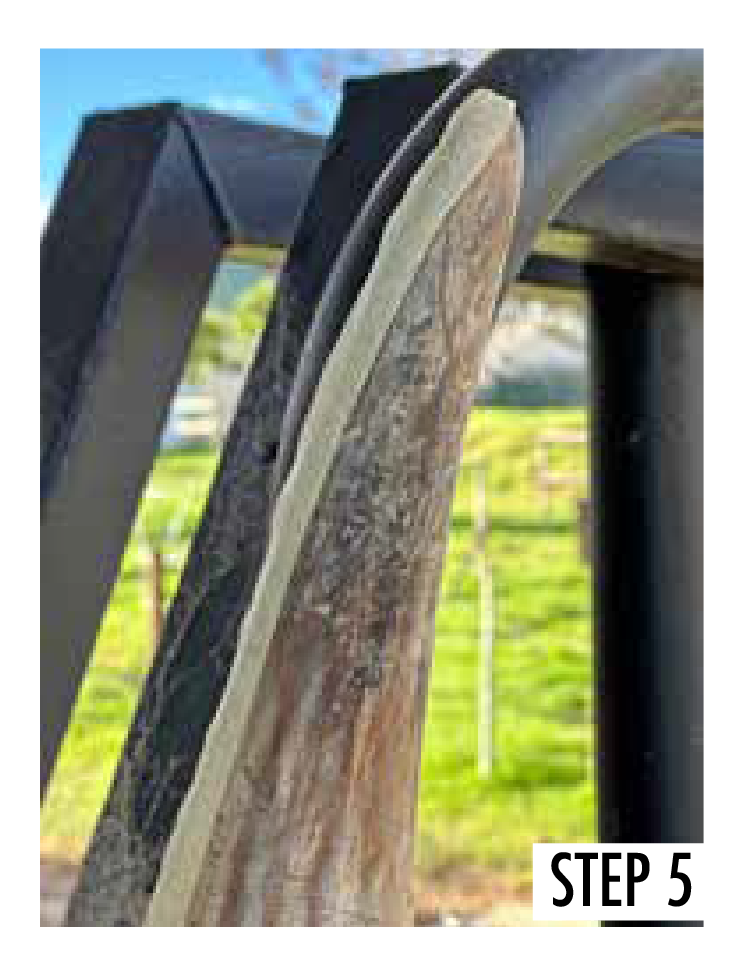
Step 5: Measuring Horn Length
Measure along the outer curve from base to tip. Adjust starting point based on horn shape. Secure line with tape if needed. Follow in line with the grain of the horn from the bottom to the tip. Once again, take your weed-eater tape and measure it on a flat surface using the steel tape.
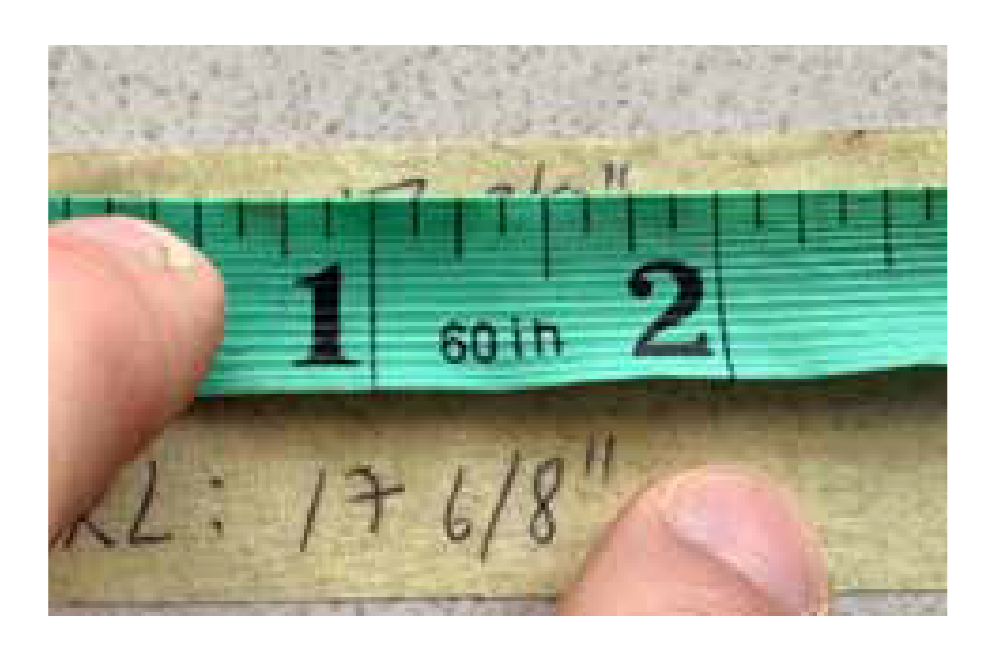
Step 6: Record and Verify
Have measurements certified by a vet or inspector and keep records for breeding and sales. Considering Ankole use their horns, having certified measurements allows you to demonstrate the horn length at different ages for your animals.
Final Thoughts
Accurate horn measurement is a simple but valuable skill. Stay consistent, work calmly, and keep good records.
Remember — calm animals + consistent technique = accurate results. That accuracy pays off when it comes time to market your animals or evaluate your breeding program.
Good luck—and happy measuring.
Integrated Herd Health Management in Ankole Cattle
Integrated Herd Health Management in Ankole Cattle:
A Practical Approach to Vaccination, Parasite Control, and Surveillance
By Dr Tinette van Wyk, ARC-Animal Production, Irene, South Africa
Introduction
Sustainable and profitable Ankole cattle production depends on a well-structured herd health program that goes beyond vaccination alone. While vaccination forms the backbone of disease prevention, optimal herd performance is achieved through the integration of parasite control, ongoing surveillance, and strategic seasonal management.
This article outlines a practical, field-applicable approach to combining vaccination programs with internal and external parasite control, tailored to Southern African conditions.
A Holistic Herd Health Strategy
An effective herd health system is built on four key pillars:
- Vaccination Programs
- Internal Parasite Control
- External Parasite Control
- Surveillance and Monitoring
These components must work together and not in isolation, to ensure optimal animal health, productivity, and sustainable production.
Surveillance
The foundation of decision-making is surveillance. Routine monitoring is often overlooked but is critical for informed management decisions.
- Annually test the whole herd for tuberculosis and brucellosis
- Conduct post-mortems on unexplained deaths
- Use blood smears for tick-borne disease diagnosis
- Perform body condition scoring (BCS) every 2–3 months
- Conduct external parasite monitoring
- Inspect animals every 2–3 weeks during high-risk seasons. Focus on predilection sites such as ears, tail switch, and underbelly
- Treat infestations promptly rather than waiting for scheduled treatments
To minimize resistance and maximize effectiveness, dosing should be strategic:
- Late summer (Feb–March): Target peak worm burdens
- Early winter (May–June): Reduce carry-over infections
- Late winter/early spring (Aug–Sept): Prevent build-up before the rainy season
To control Liver Fluke in high-risk areas treat at the end of summer and mid-winter. Use appropriate flukicides and observe withdrawal periods.
Treating Calves
Give calves their first treatment at 6–8 weeks old. Repeat every 2–3 months until one year of age. During this period monitor for signs of coccidiosis (diarrhoea, straining to defecate, dehydration and reduced appetite), especially under stress conditions.
External Parasite Control
External parasites significantly impact productivity through irritation, disease transmission, and stress.
Tick Control
- Ticks are among the most economically important parasites in Southern Africa
- Summer (Oct–March): Treat every 2–3 weeks
- Winter: Treat only when necessary
To prevent resistance:
- Rotate acaricide classes regularly
- Implement fly and tick control
- Tick loads generally peak during warmer months
- Use pour-on’s, fly tags, or feed-through treatments where applicable
Lice Control
- Lice are most prevalent in winter
- Treat during mid-winter if infestations are detected
- Integrating with the vaccination program
Proposed Vaccination and Monitoring Calendar
To improve sustainable production, parasite control and surveillance should align with existing vaccination schedules. Proposed vaccinations and monitoring protocols per month are detailed below:
March
- Tuberculosis and brucellosis testing
- Add faecal egg counts and targeted deworming if required
April
- Clostridial and botulism vaccinations
- Combine with internal parasite control where necessary
May–June
- Lumpy skin disease vaccination period
- Implement winter deworming and monitor external parasites
August
- Rift Valley fever and other seasonal vaccinations
- Initiate pre-rain parasite control and increase tick monitoring
Key Management Considerations
Avoid:
- Routine blanket dosing without evidence
- Repeated use of the same deworming class
- Ignoring withdrawal periods
Implement:
- Rotation of deworming classes
- Quarantine protocols for new animals
- Regular monitoring and record-keeping
Conclusion
An integrated herd health program that combines vaccination, targeted parasite control, and continuous surveillance is essential for maintaining the resilience and productivity of Ankole cattle.
By shifting from routine treatments to evidence based, strategic interventions, producers can:
- Improve animal performance
- Reduce input costs
- Slow the development of drug resistance
Ultimately, this approach supports both economic sustainability and animal welfare, ensuring long-term success in Ankole cattle production systems.